Roof top tent
- pumpkinflower
- Oct 8, 2020
- 4 min read
Updated: Jan 25, 2022
We love camping. We love sleeping and waking up in tents. There is nothing like open air nights and early morning sunrises. We love the smells, sounds, and air of nature that can only be experienced with tent camping. This is one of the reasons we were looking for an old school pop-up for our Nova Scotia anniversary trip. Covid put a stop to that trip but inspired this build.
There are lots of roof-top tents out there. After lots of research, we decided bundutop, based out of South Africa, was the best light-weight and sturdy tent on the market. When our tent arrived, the freight driver had some issues with our location. Our road is narrow and too curvy for big trucks. Thankfully, we have a wonderful neighbor at the end of our road who agreed to host our bundutop package in her driveway until we were able to rent a forklift. Within the week, operation bundu was underway.

We got the extra large size bundutop so that it would span the length of our van. This was important because we wanted inside access to the "upstairs" sleeping area without making the sleeping area too small. Our bundu package weighed ~600 lbs. Once unpacked, it's closer to 300 lbs.

Our van is bad-ass. It can tow a 7,000+ lb forklift.

The van didn't come with a roof rack. Our roof rack is pretty simple. It's made of thick metal pipe attached to the van using the threaded holes meant for mounting roof appliances. I'll write another blog post with more pictures to better explain this process.


It was surprisingly light. After it was on the roof, we were able to easily move and center it. Sean then screwed it onto the roof rack according to bundu instructions.

We were able to install it pretty quickly which is good because the forklift had to be back the same day we rented it.

Hooray! First time up in the tent. There are windows on all 4 sides. This tent reminds me of my family's tent growing up which was also canvas. Bundu goes up and down with a push of a button (electric winch). When there's anything mechanical involved, it makes me a little nervous because it can break. But these mechanics are simple and if something breaks, Sean assures me it'll be easy to fix. And the tent goes up (or down) in about 30 seconds. Pretty quick set-up!
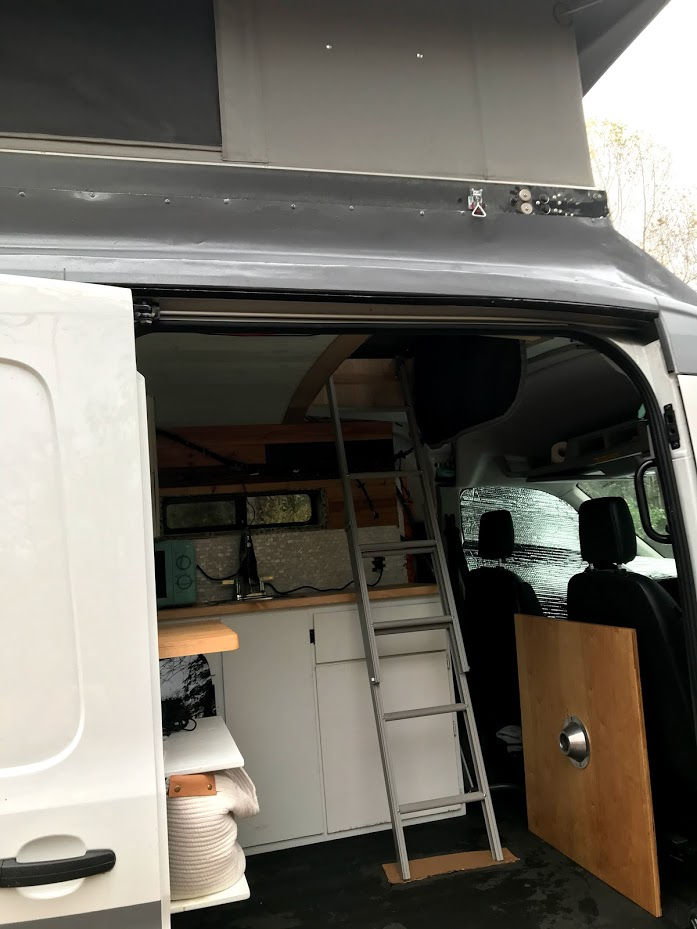
We took a test trip (see testing blog) before our next step- which was cutting holes in the ceilings and floors to make the tent accessible from the inside of the van. That trip taught us a lot. One thing that I knew, but this experience proved it even more: climbing a 10 foot ladder in the middle of the night because your dogs broke through the van screen door (attached with super strong but not strong enough magnets) to chase some sort of night squirrel is not comfortable, fast, or ideal, especially when the no-see-ums swarm the inside of the tent during the commotion. So among other things to be fixed, we knew that we had to have access to the tent from inside the van. The climb will also be shorter which will feel safer.

First step is insulation. One of the things the bundu manufacturers say is that moisture can be a problem. The floor of the tent can accumulate condensation and that can damage the mattress. Insulating this space before we seal it will (hopefully) eliminate that problem. It will also add a layer for over-all van climate control. These are the same poly boards we used in the walls of the van.

The seams are sealed with butyl tape and metal sheets are riveted to the van and to the tent shell. We used galvanized steel flashing for the sides and back and 20 gauge steel for the front.

Fairing compound (a drywall-type material for boats) fills in all cracks forms the front triangle sides.

It's very dusty (and gross) but sands down for smooth edges.

We now have new holes in both the ceiling of the van and in bundutop's floor. We'll have another, much smaller one in the back of the van for ventilation for the lower bed.

Bundu's support beams are attached to the roof rack. Super sturdy and now they are one!
The next insulation we used was polyurethane foam. We put it in the sides of the cut-out and it filled in the front area which is more curved, and harder to access, than the sides.
The foam was the worst. It gets everywhere and it's so toxic.

I had a hard time with the insulation process because all of our insulators are plastic based and really unpleasant overall. This will be another thing to change if we do another build. From this experience, we've talked about switching to wool and using the heavier steel (but maybe 22 gauge) for the whole enclosure.

The hole is framed and the ladder hardware attached.

We also have our vent in the back (above the lower bed/table) cut and framed.
We primed and painted the top so it looks seamless (mostly). Almost done with the roof top tent...


Comments